


The strength of any building depends on its base. Did you know that the parcel creation and site layout planning are the two main important components of land development? From residential townships and plotted communities to large commercial layouts. The precision in these early planning stages is very important. Accurate planning ensures better compliance, maximizes land use efficiency, and leads to smoother project execution.
The precision helps to ensure better compliance, enhanced land use efficiency, and smoother project execution. One of the most powerful and standout tools for this purpose is Autodesk Civil 3D.
It offers designers a dynamic environment to create, edit, and manage the parcels effectively.
What are Parcels in Civil 3D
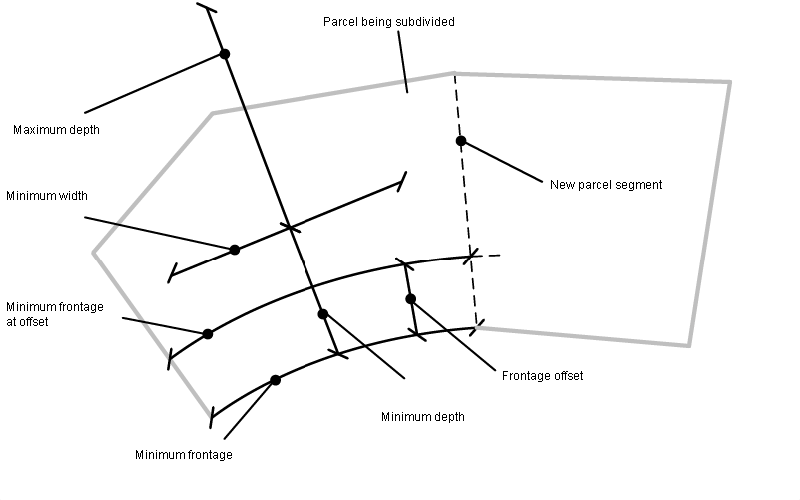
In Civil 3D, parcels represent the subdivided pieces of land defined by the boundaries. These are the building blocks of the site planning. It helps to determine the zoning setbacks, lot sizes, frontage dimensions, right-of-way width, and many other things.
One of the distinguishing and strongest features of the Civil 3D parcels is their dynamic nature.
They update automatically when connected with the geometry, such as when alignments or boundaries change. It makes site development far more efficient.
What are the Key Techniques for the Parcel Creation
Civil 3D provides various methods to create the parcels depending on the demand of the project. Some of the most commonly used techniques include:
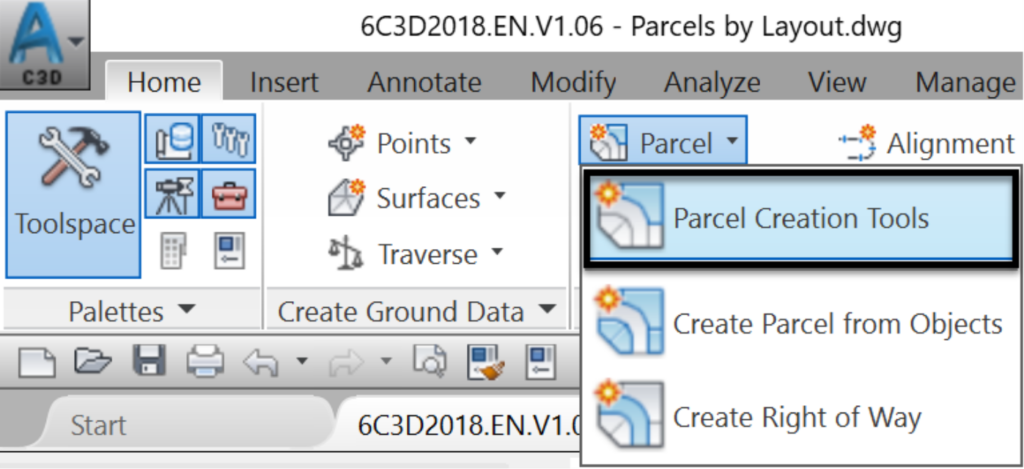
- Using the Parcel Layout Tool
The Parcel Layout toolbar offers fixed, free, and Slide creation methods. These tools help to generate precise lot configurations. But it is with the maintenance of the relationships with the adjacent features. Any updates to these features automatically reshape the parcel geometry.
- Converting Existing AutoCAD Geometry
Survey lines, boundary polylines, or any existing AutoCAD geometry can be quickly converted into parcels. This is especially helpful when working with survey drawings, redevelopment sites, or government-provided land boundaries.
- Applying Styles and Labels
Civil 3D allows the application of various parcel styles. Additionally, it enables the application of automatic labelling for areas, perimeters, segment lengths, and bearings. It is noted here that these labels are updated in real-time. They help eliminate manual editing errors and improve project accuracy.
How to Do the Site Layout Planning Using Civil 3D
A well-designed site layout requires more than just creating the parcels. It involves integrating roads, grading, and utility considerations. The step-by-step guide to the site layout planning is as follows:
Step #1: Road Alignments
Alignments guide the arrangements of lots and blocks. Civil 3D ensures parcels adapt automatically when alignment geometry changes. But with the reduction in the rework.
Step #2: Interaction with Surfaces
Parcels can be analysed against surface elevations to understand the grading requirements. Designers can review slopes, drainage paths, and cut and fill needs very early in the planning stage.
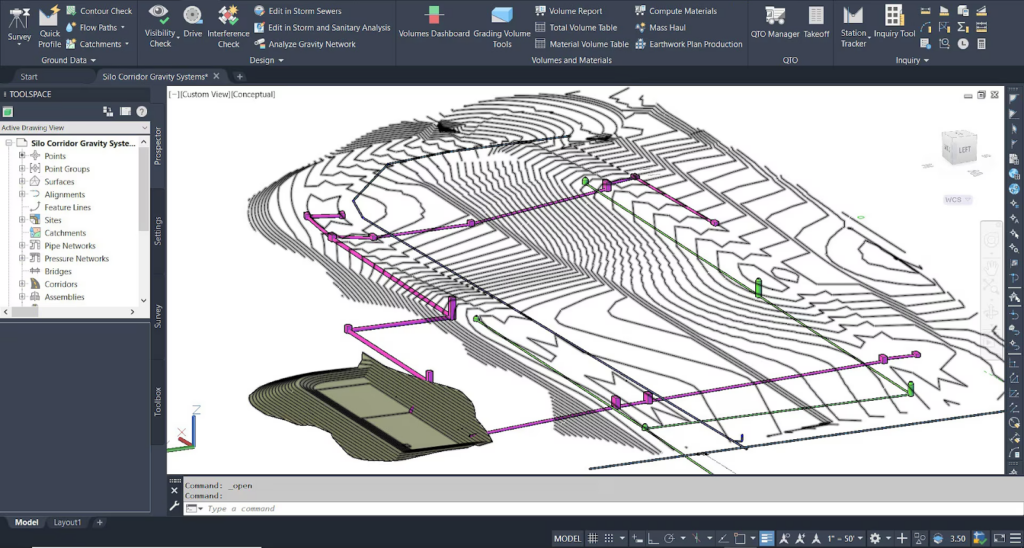
Step #3: Visualisation Tools
By using the object viewer, the designers can explore the site in 3D before the finalisation of the designs. It helps to identify potential issues ahead of time.
Why Learning These Skills Matters
For anyone who is pursuing a Civil 3D training course online, parcel creation and site layout are the fundamental skills. These competencies help to enhance the design speed and accuracy.
Also, it allows the professionals to collaborate better with the surveyors, planners, and architects. As the land development projects grow more complex, Civil 3D expertise continues to be a leading advantage in the civil engineering industry.
Contact us today to get started!